Lillian’s Honey Whole Wheat Bread
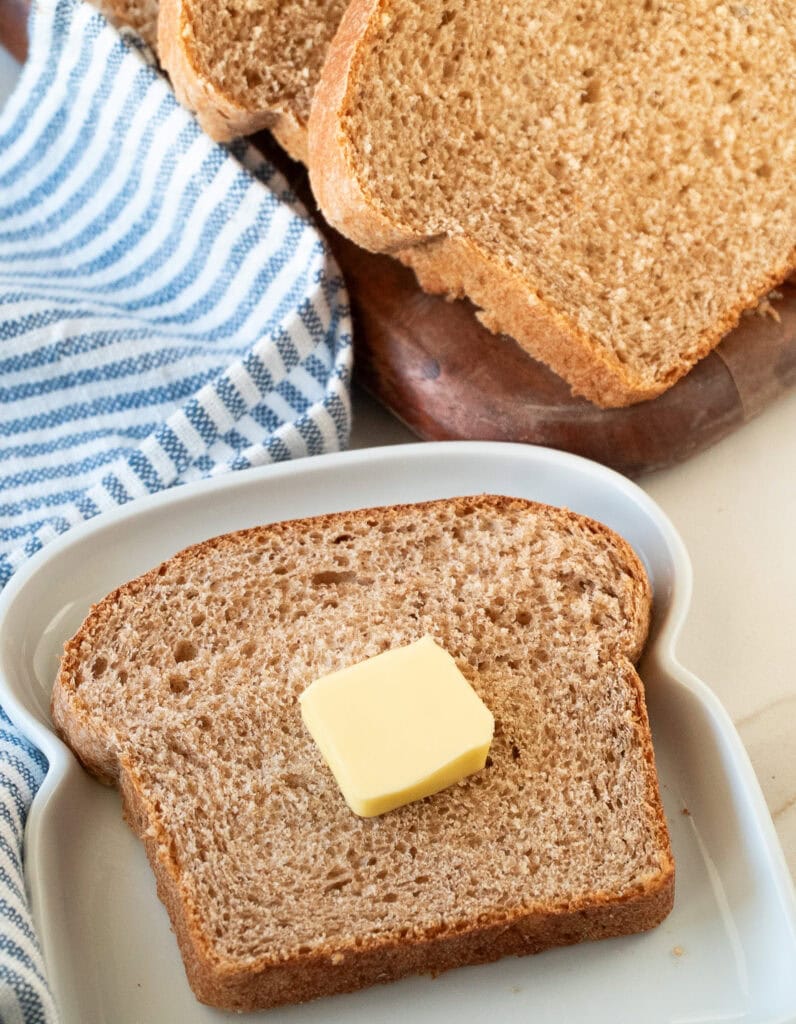
Soft, lightly sweet, and deeply comforting, this honey whole wheat bread bakes up tall and tender with a delicate crumb and golden crust. It slices beautifully for sandwiches, but toasts into something truly special — crisp, almost melba-like edges with a warm, pillowy center. This is everyday bread the way it used to be.
This Honey Whole Wheat Bread Goes Perfect with:
Some smells carry you back instantly. For my husband, it’s his grandmother Lillian’s bread baking.
In his late twenties, he followed her around her kitchen, trying to capture measurements mid-motion — translating her instinct into cups and teaspoons before the moment could disappear. His goal was simple: to make sure he could “always smell Grandma’s bread in my house.”
The Bread That Shaped Family Moments
Lillian baked this honey whole wheat bread often — sometimes twice a week. His grandfather would slice it thick and toast it until the edges turned delicately crisp. It wasn’t fancy bread. It was snack bread. Butter-at-the-counter bread. The kind of everyday loaf that quietly becomes part of family life.
More than two decades later, I pulled the recipe back out and decided to try again. With a few careful adjustments — slightly less salt, better gluten development, and the steady rhythm of a dough hook — the bread finally came back to life.
I’ll never forget his reaction when the smell filled our kitchen and he took that first bite. For a moment, time folded in on itself.

Lillian’s Famous Bread Bowl
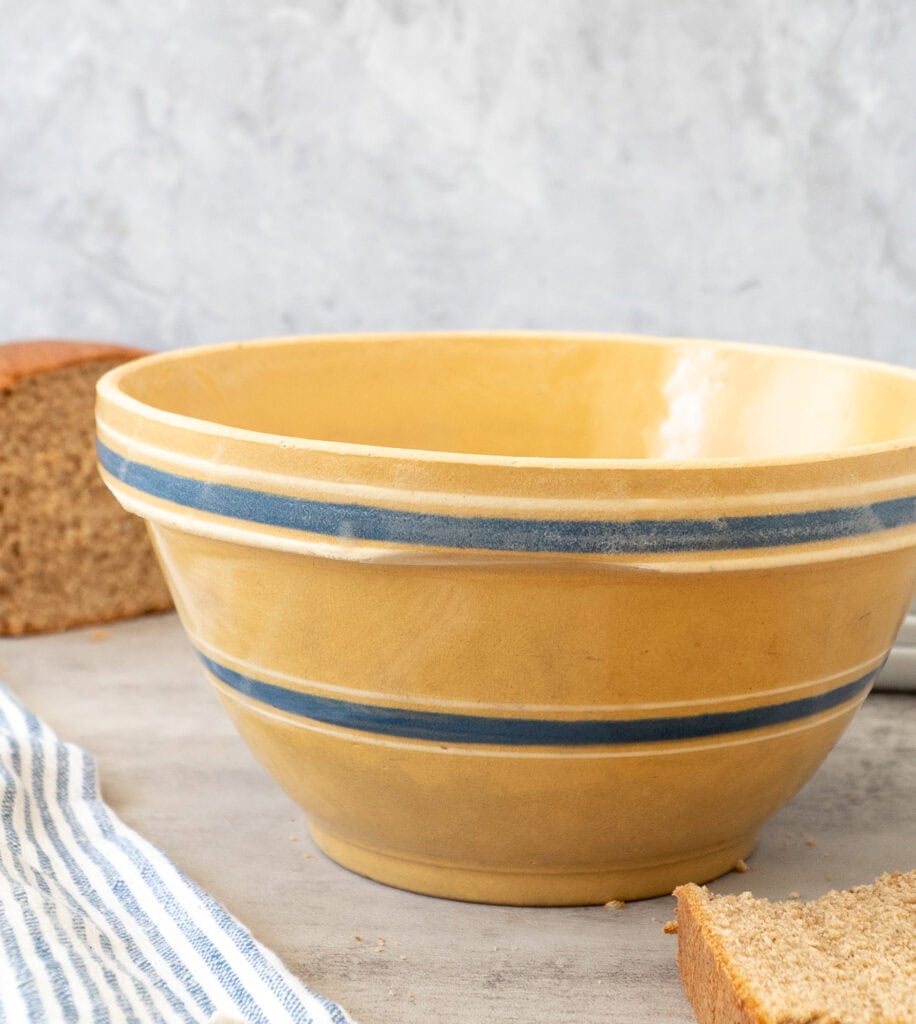
Every family kitchen seems to have one object that quietly carries the story of a lifetime of cooking. For Lillian, it was her yellow bread bowl with the blue stripes.
This was the bowl she reached for every time she made bread — the one my husband watched as she measured flour by instinct and kneaded dough by feel. Over the years it held hundreds of batches, rising and resting on her kitchen counter while the house filled with the warm smell of fresh bread.
To anyone else it might look like an ordinary bowl. But in our family, it’s part of the bread’s story — the place where the recipe lived long before it was written down.
Other Recipes that Go Great with This Bread!


Ingredients
This is a soft, enriched whole wheat dough with a balance of structure and tenderness.
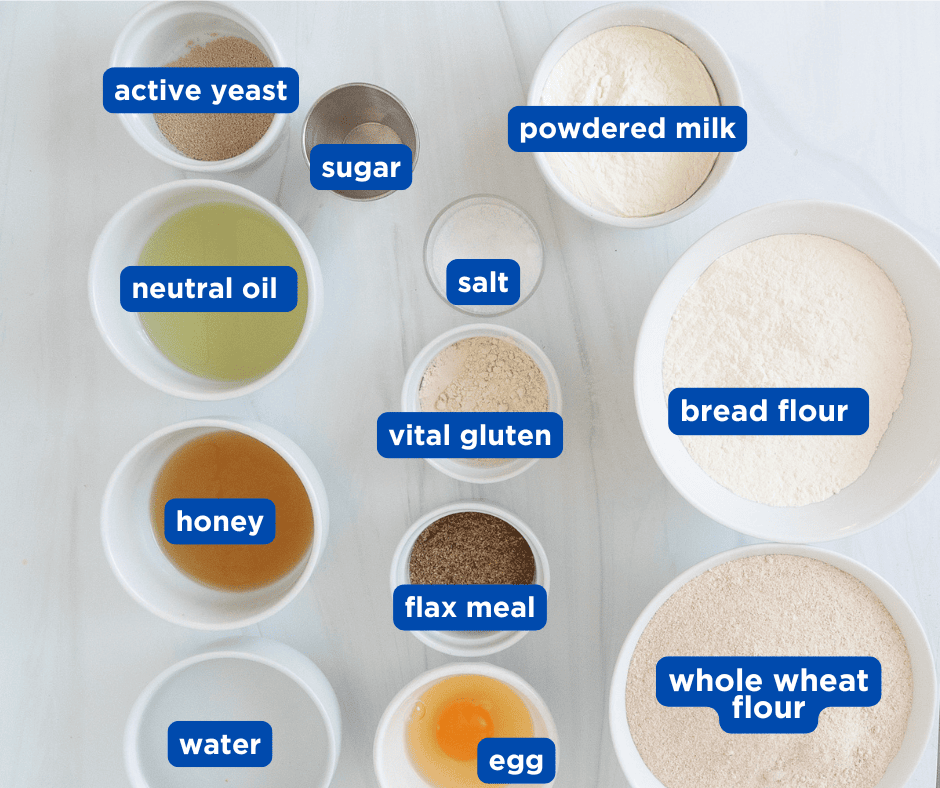
- ACTIVE YEAST (for proofing)
- WARM WATER
- NEUTRAL OIL (Vegetable or Grapeseed)
- HONEY
- LARGE EGG
- WHOLE WHEAT FLOUR
- BREAD FLOUR
- POWDERED MILK
- VITAL GLUTEN
- FLAXSEED MEAL
- KOSHER SALT
Mixer Options: Ankarsrum, KitchenAid, or By Hand
This is a soft, enriched whole wheat dough, and it works beautifully with a variety of methods. Use what you have—just pay attention to the dough’s texture rather than the clock.
KitchenAid (recommended for most readers):
Use the dough hook on speed 2 and knead for 7–9 minutes. The dough should become soft, elastic, and slightly tacky, pulling from the sides but still lightly sticking to the bottom.
Ankarsrum (my preferred method):
Use the dough hook (not the roller) and knead 8 minutes, rest 5 minutes, then knead another 5 minutes. The gentler kneading helps create a tender, lighter crumb.
By Hand:
This dough can absolutely be made by hand — that’s how Lillian originally made it. Knead for 10–12 minutes until smooth and elastic. It will feel sticky at first—resist adding too much flour. A softer dough yields a lighter loaf.
No matter the method, the goal is the same: a dough that feels soft, supple, and slightly tacky—not stiff.
Step-by-Step Instructions
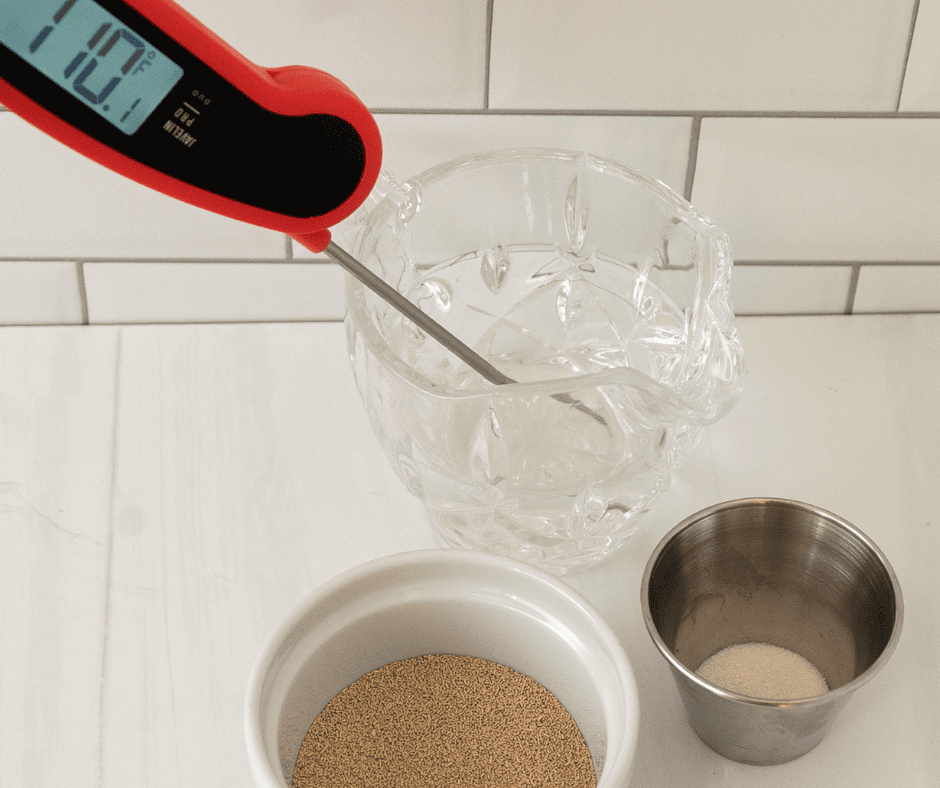
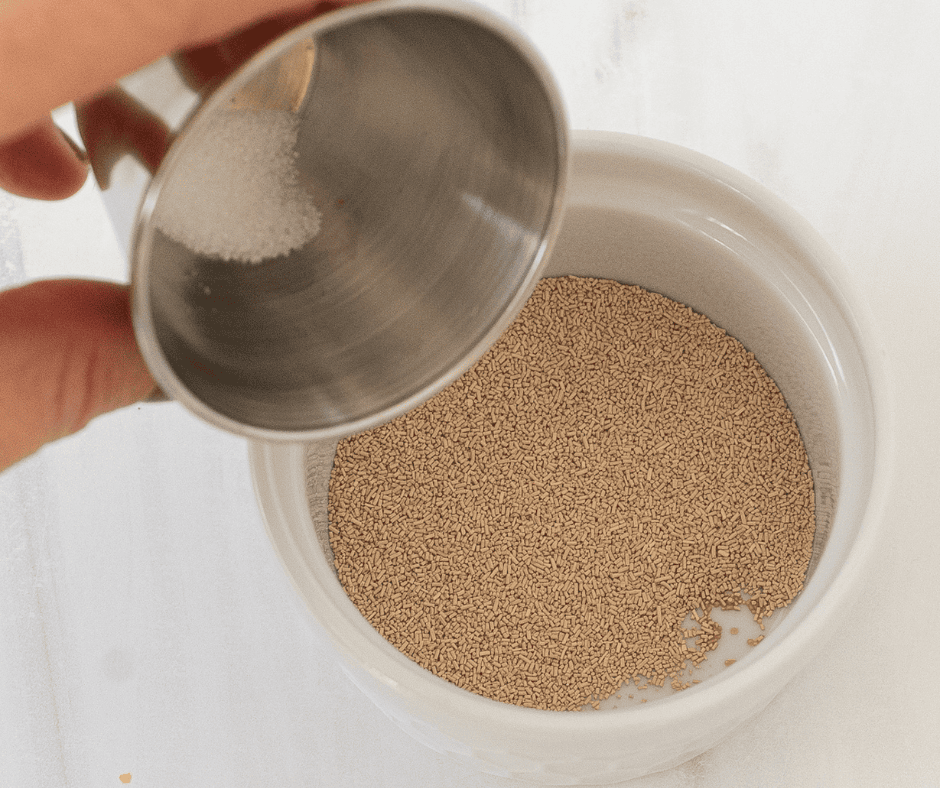
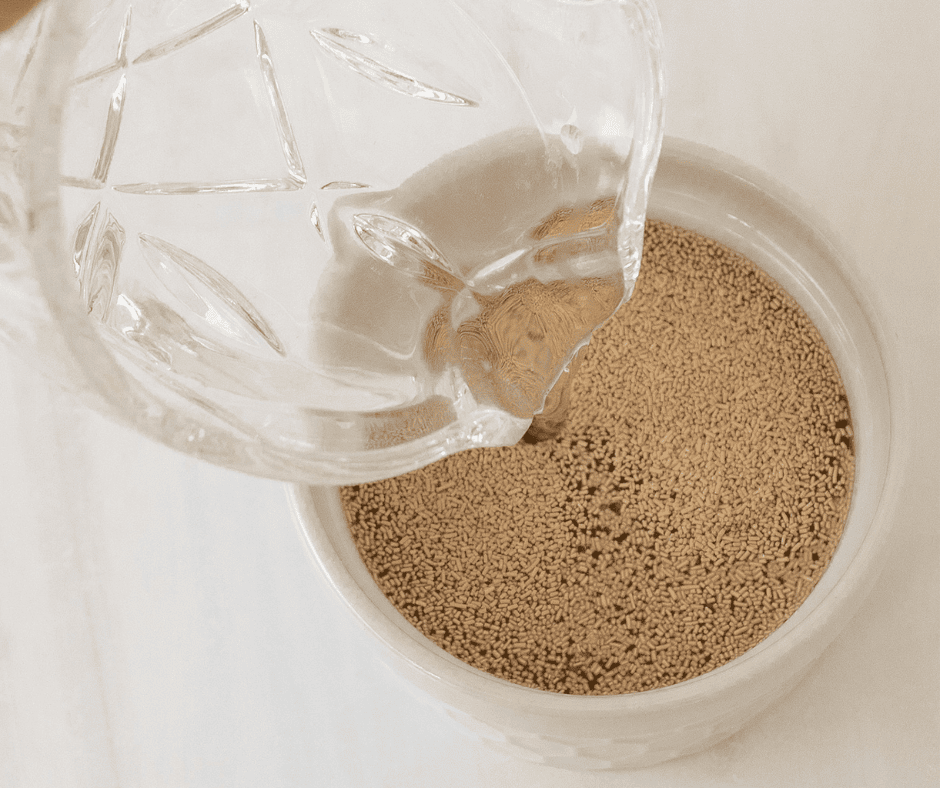
1. PROOF THE YEAST
- In a small bowl combine yeast, 120 g warm water, and a pinch of sugar.
- Stir gently and let sit 5–10 minutes until foamy and bubbly.

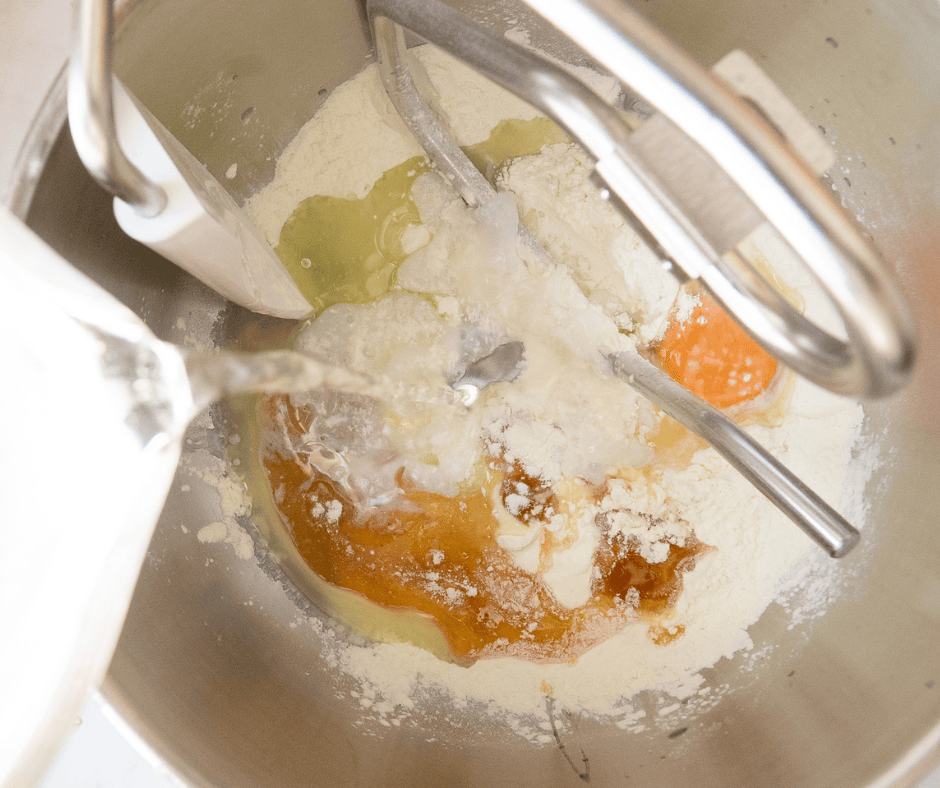
2. MIX THE LIQUIDS
In the bowl of a stand mixer fitted with a dough hook, combine 495 g warm water, powdered milk, oil, honey, salt and egg. Mix briefly on low speed until blended.
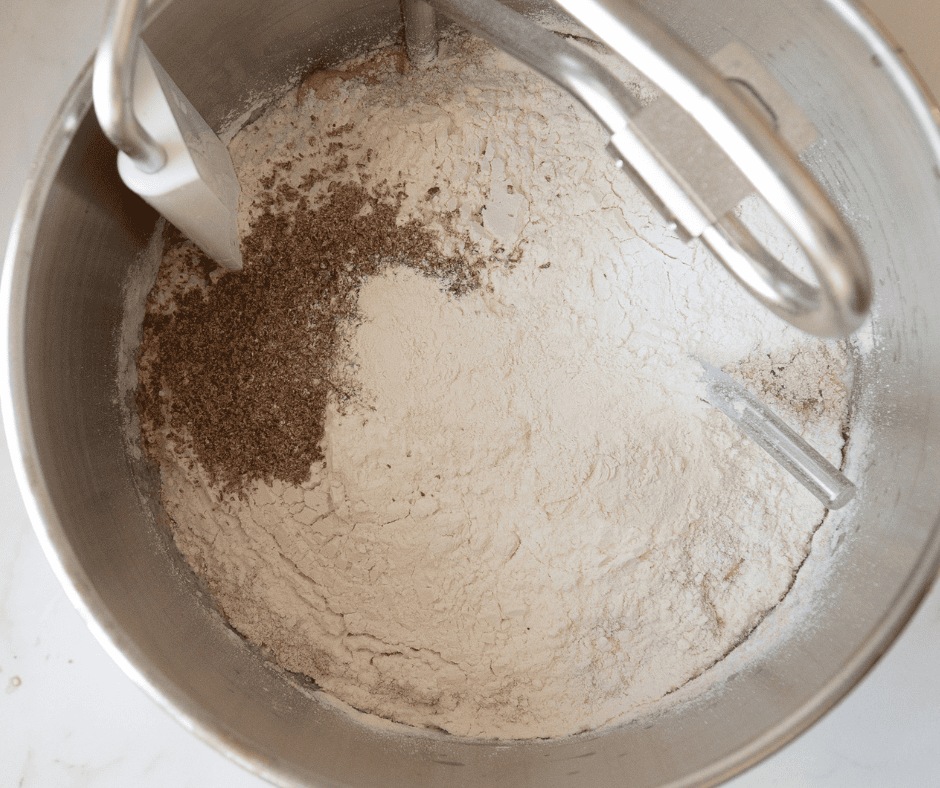
3. ADD DRY INGREDIENTS
Add whole wheat flour, bread flour, vital wheat gluten and flaxseed meal. Mix on low until a rough dough forms, then add the yeast mixture.
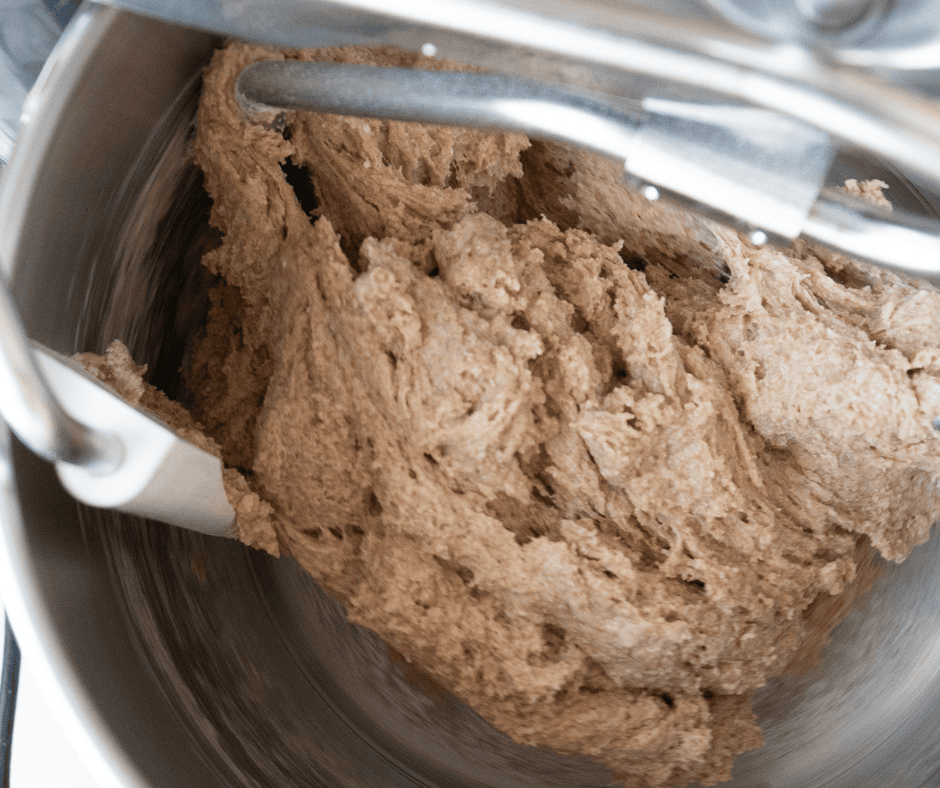

4. KNEAD THE DOUGH
- Knead on Speed 2 for 8–10 minutes.
- The dough should become soft, elastic and slightly tacky. It should pull away from the sides of the bowl but still lightly stick to the bottom.
Tip: Whole wheat dough should feel soft and slightly sticky. Avoid adding too much flour.
5. FIRST RISE
- Transfer dough to a lightly oiled bowl. Turn once to coat.
- Cover and let rise 60–90 minutes, or until roughly doubled.
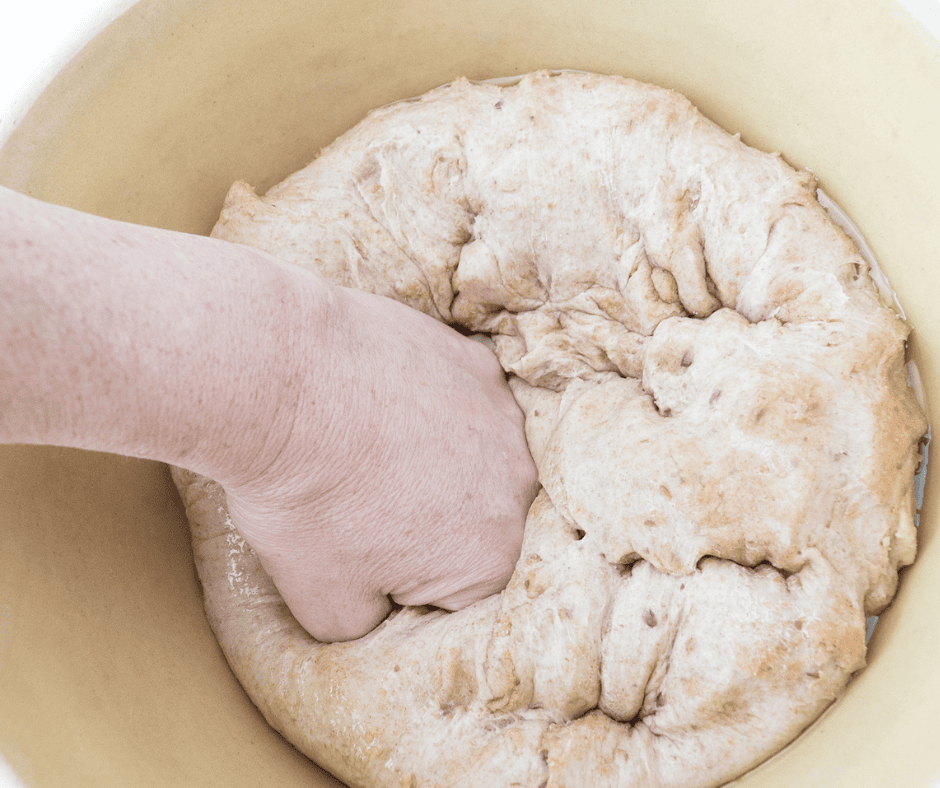
6. REST THE DOUGH
- Gently deflate the dough.
- Cover and let rest in a warm spot for 45 minutes.
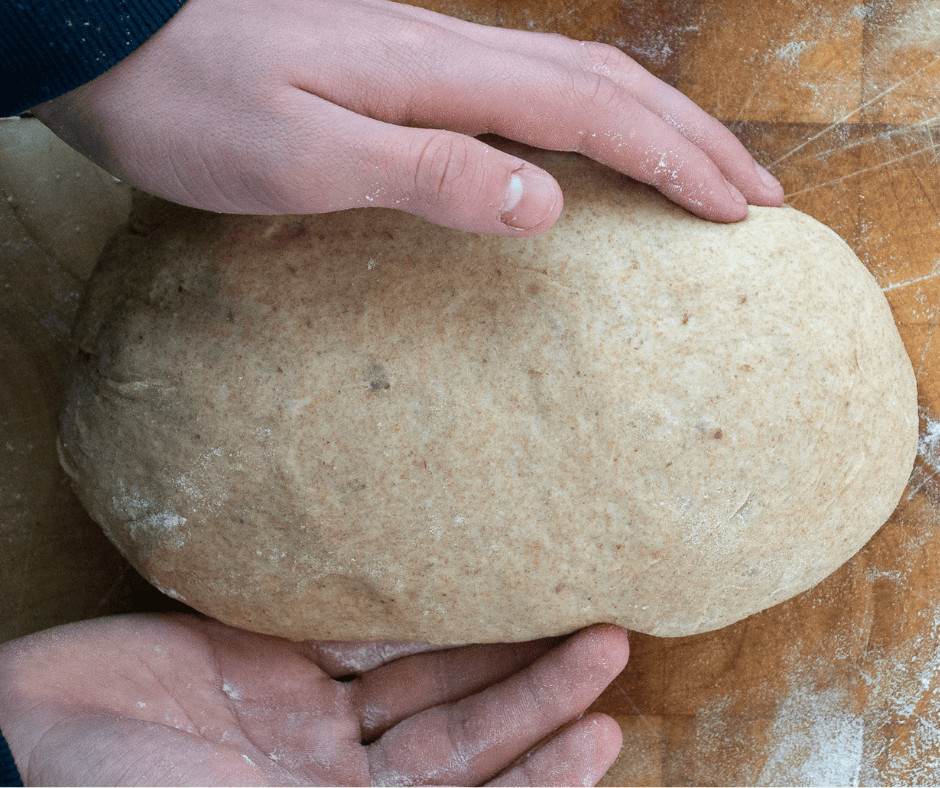
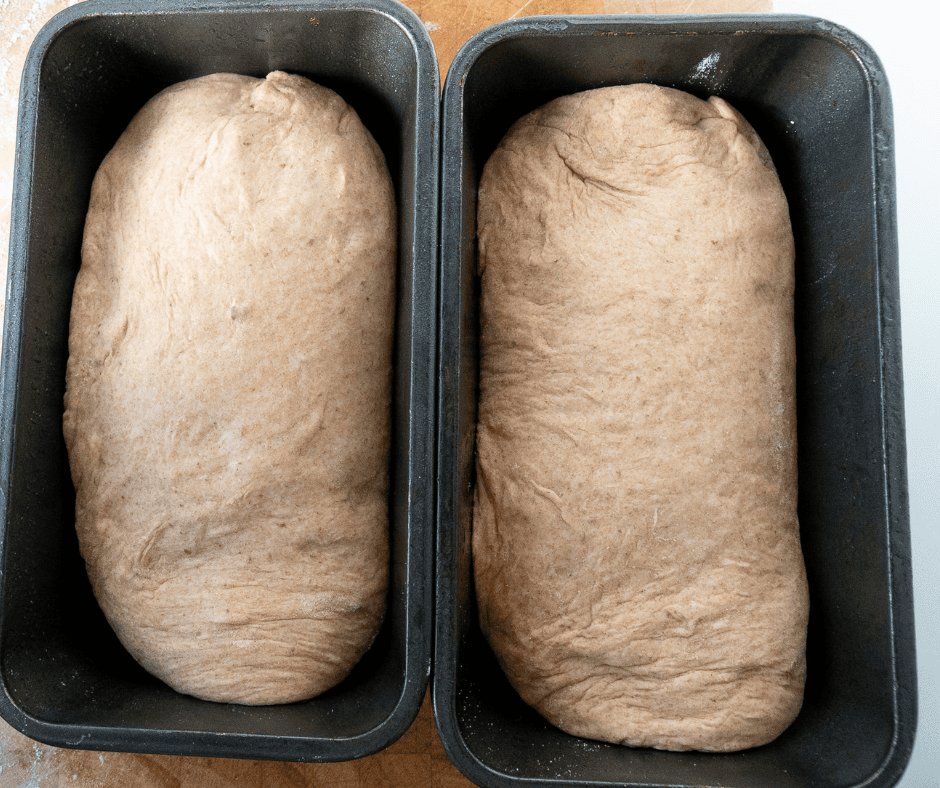
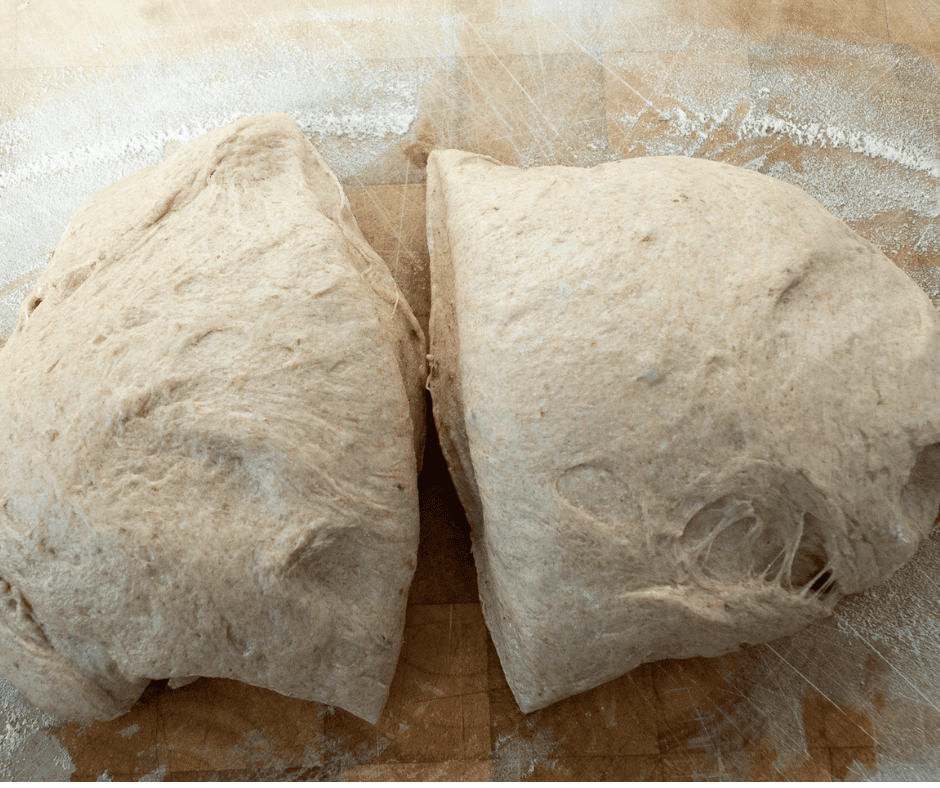
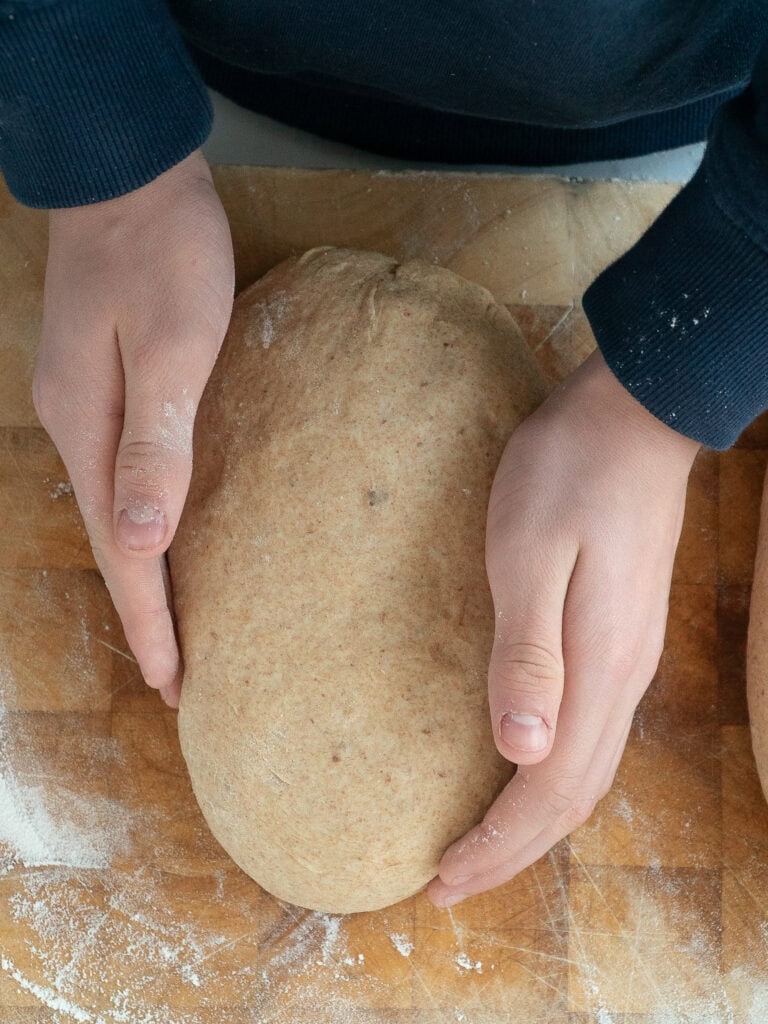
7. SHAPE THE LOAVES
- Divide dough into 2 equal pieces.
- Shape each piece into a tight log and place in greased 9×5 loaf pans.
- Let rest 10–15 minutes.
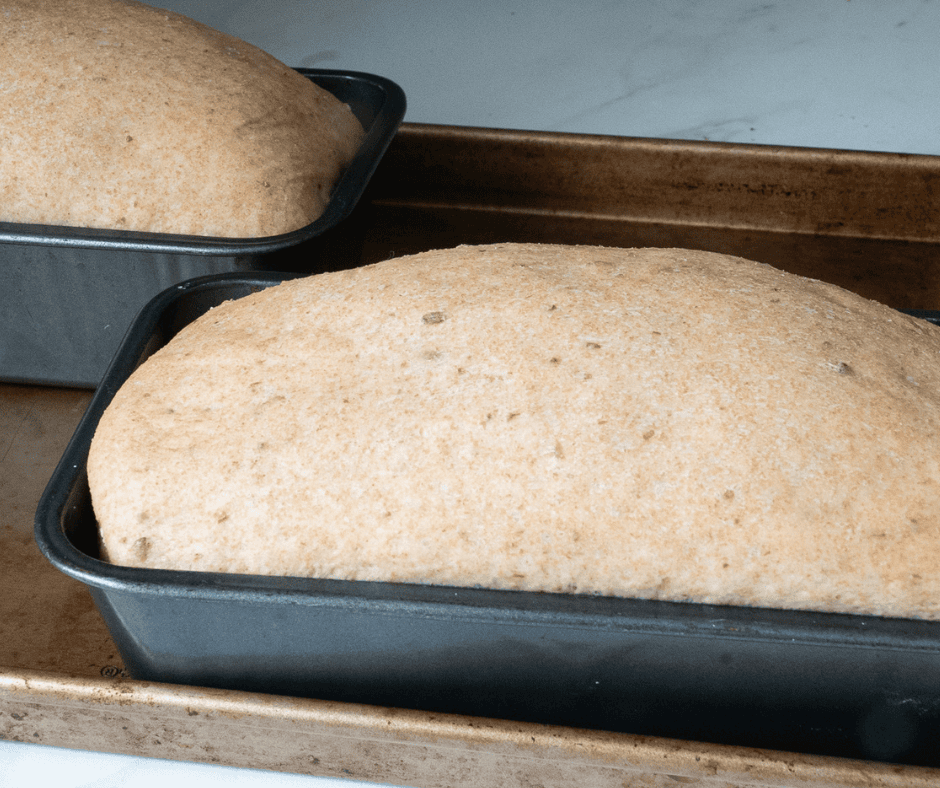
8. FINAL RISE
- Cover loosely and let rise 30–45 minutes, until the dough is domed and about 1–1½ inches above the rim of the pan.
- Preheat oven to 375°F during the final rise.
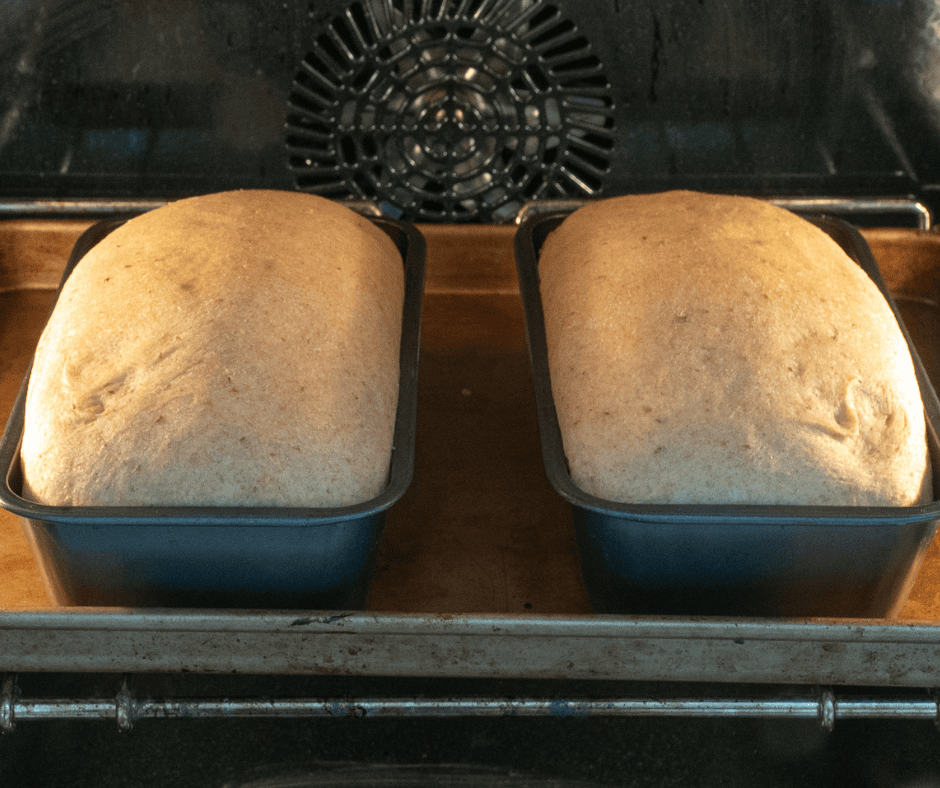
9. BAKE
- Bake 20 minutes uncovered.
- Loosely tent with foil and bake another 20 minutes, until internal temperature reaches 200–202°F.
- Remove loaves from pans within 5 minutes and cool completely before slicing.
What the Dough Should Be Like
This is a soft, enriched whole wheat dough, and the texture matters more than the clock.
- After kneading: soft, elastic, and slightly tacky. It should pull from the sides of the bowl but still lightly stick to the bottom.
- After the first rise: puffier and airy, with a slightly domed surface. It may not fully double, but it should feel lighter when pressed.
- Before baking: risen 1–1½ inches above the pan rim, soft and pillowy. A gentle press should slowly spring back.
A soft dough is what gives this bread its light, tender crumb—resist the urge to add too much flour.
Tips for a Light, Fluffy Loaf

Keep the dough soft
Whole wheat flour and flax absorb a lot of moisture. A slightly sticky dough will bake up lighter than a firm one.
Let the final rise go far enough
Don’t rush this step. The dough should rise above the pan before baking—this is what creates that tall, domed loaf.
Don’t under-knead
This dough needs full gluten development to trap air. It should feel smooth, stretchy, and elastic before the first rise.
Troubleshooting: Why Didn’t My Bread Rise?
- Dense or heavy loaf → Dough was too dry or over-floured
- Didn’t rise enough → Needed more time during the final rise
- Tight crumb → Not kneaded long enough
- Flat or collapsed loaf → Overproofed before baking
Bread like this improves quickly with small, simple adjustments. Focus on how the dough feels, and it will become more intuitive each time.
Lillian’s Honey Wheat Bread
A soft, lightly sweet honey wheat bread with a tender crumb and golden crust. This nostalgic family loaf slices beautifully for sandwiches and toasts with delicate, crisp edges and a warm, pillowy center.
Ingredients
YEAST MIXTURE
- 7 g active dry yeast
- 120 g warm water (105–110°F)
- Pinch of sugar
DOUGH
- 510 g warm water
- 100 g powdered milk
- 60 g vegetable oil
- 60 g honey
- 10 g salt
- 1 large egg (50 g)
- 540 g whole wheat flour
- 240 g bread flour
- 14 g vital wheat gluten
- 15 g flaxseed meal
Instructions
Combine yeast, 120 g warm water, and a pinch of sugar. Stir and let sit 5–10 minutes until foamy.
2. MIX THE LIQUIDSIn a stand mixer (dough hook), combine: 510 g warm water, powdered milk, oil, honey, salt, and egg.
Mix on low (Speed 1) until blended.
Add whole wheat flour, bread flour, vital wheat gluten, and flaxseed meal. Mix on low until a shaggy dough forms. Add the yeast mixture.
4. KNEAD THE DOUGH:Knead on Speed 2 for 7–9 minutes, stopping once halfway to scrape and flip dough.
Dough should be soft, elastic, and slightly tacky—pulling from sides but lightly sticking to bottom.
(If dough forms a tight ball, add water 1 tsp at a time.)
Transfer to a lightly oiled bowl, cover, and rise 60–90 minutes until puffy and nearly doubled.
6. SECOND RISEGently deflate. Cover and rest 45 minutes.
7. SHAPE THE LOAVESDivide into 2 pieces, shape into tight logs, and place in greased 9×5 pans. Rest 10–15 minutes.
8. FINAL RISECover and rise 30–55 minutes, until dough is domed and 1–1½ inches above pan. Preheat oven to 375°F.
9. BAKEBake 20 minutes, tent with foil, then bake 20 minutes more (200–202°F internal). Remove from pans after 5 minutes; cool completely before slicing.
–
Meet Lillian | Matriarch Muse
Known for her strength, precision, and quiet competence, Lillian brought that same balance to her kitchen—her cooking was wholesome, thoughtful, and never fussy. She was an avid gardener who cooked from her harvest and baked her “house bread” twice a week: a soft, honey whole wheat loaf meant for slicing thick and toasting.